Joe's Site ⌐■_■
Keyboard Build
Losing sight of the objective but having fun along the way.
Prelude
In early 2025, I found myself stuck in a chair on a computer a lot more than is desirable. One of the unfortunate consequences of tip-tapping away for far longer than a bipedal ape should, is the impending dull, niggling pain commonly attributed to carpal tunnel syndrome.
In response to my bothersome wrists, I did what I had become accustomed to - opened my laptop and dove down the internet research rabbit hole.
I scoured for knowledge across the web. Google, Quora, Reddit, even ChatGPT. I needed to unearth the perfect solution.
Exercises, stretching, vertical mice, track balls, speech-to-text, "taking breaks". Plenty of solutions were offered by the eggheads of the cybersphere. But one solution in particular caught my eye. Ergonomic mechanical keyboards.
On keyboards
The typewriter operates via keys, which when pressed, cause a stamp to strike a page, printing the applicable character.
Each key is connected to its stamp with an arm. To prevent arms colliding, the keys are staggered. Look at your keyboard now. It's staggered like a typewriter. Strange. I suppose there are tiny arms in your laptop printing characters to your screen.
Ergo
Ergonomic keyboards break all the rules:
- Keys are no longer staggered row-wise.
- Keys can be staggered column-wise (like fingertips).
- Sometimes, the keyboard is split, like hands.
This was immediately attractive to me.
However, these keyboards are expensive af. Like seriously, over £300. But there is an alternative - DIY!
The build
How hard could it be? After all, I took GCSE electronics.
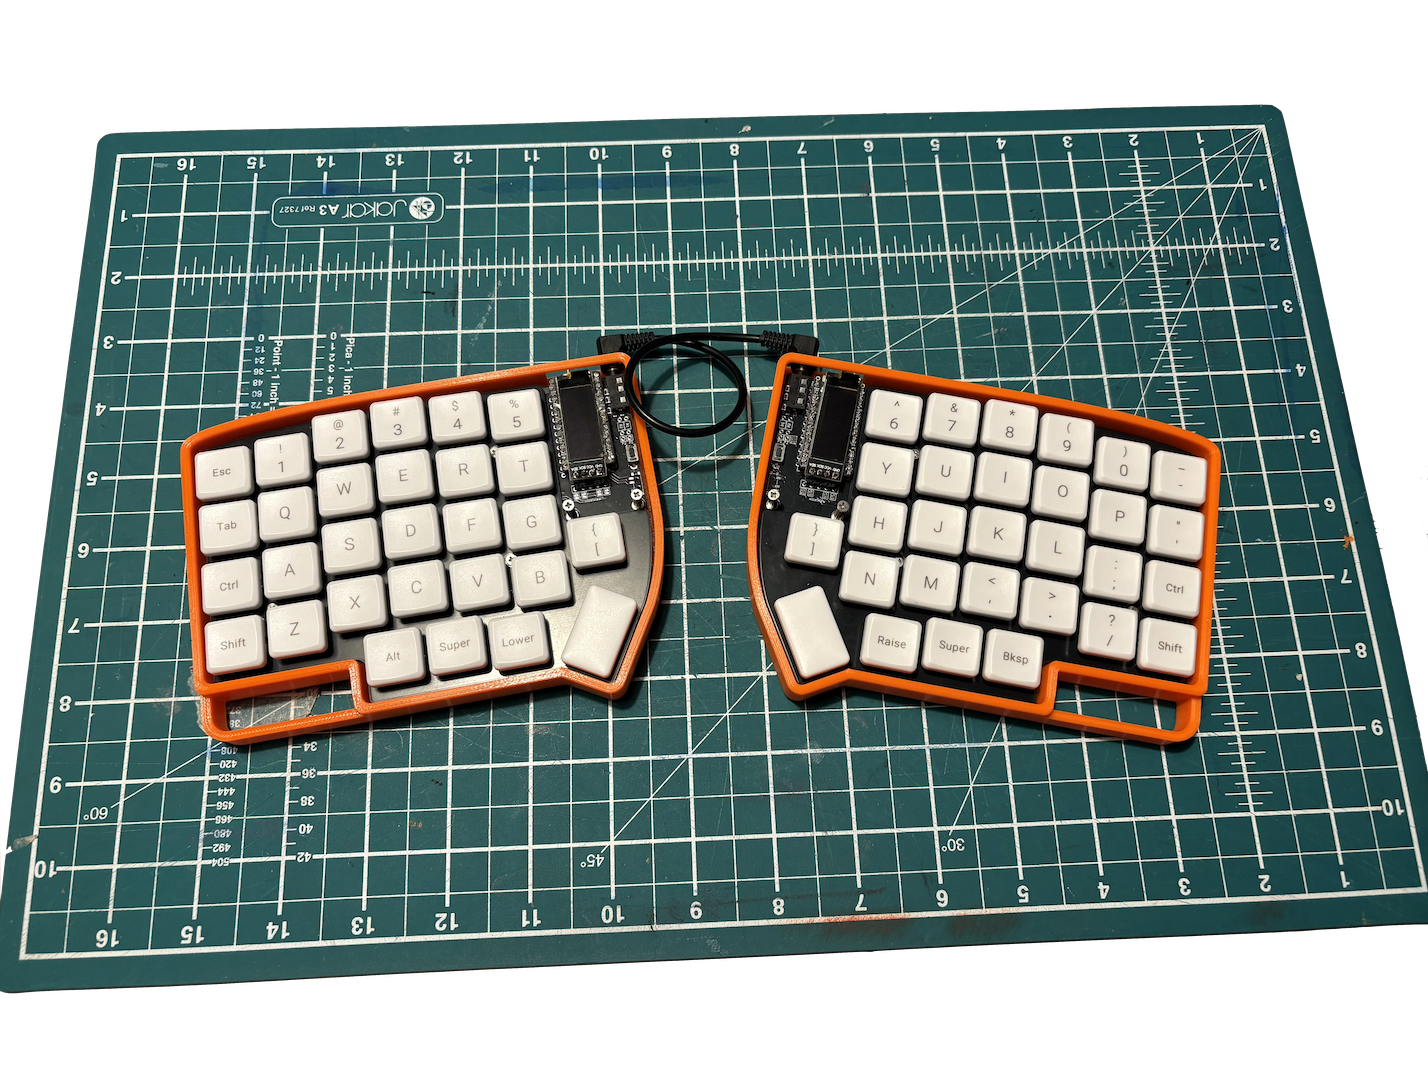
I began researching. Quickly I found the "Lily58" (58 keys), a commonly recommended beginner build. I purchased a kit containing (almost) all the required parts and a cheap soldering iron, alongside a large slice of overconfidence (already had), I was ready to build.
It turns out, soldering in GCSE electronics is not the same as soldering real consumer hardware. The kit's components were tiny and extraordinarily fiddly to position. What is this, a keyboard for ants?
To weld one of these nanomachines, one must hold the component still with tweezers, while delicately melting solder over the legs with one's 300°C rod of metal.
Now repeat 600 times.
The first 200 solder joints were an embarrassment. The next 200, still awful. But the last 200? They were passably mediocre. A win.
After completing the first PCB, it was time to test. Some fiddling around with a multimeter (and more than a few conversations with ChatGPT) led me to a devastating determination. Barely 25% of the keys were working. I desperately attempted to resolder, but had little luck.
Devastated, I gave up on the project for a few weeks.
One bored afternoon, I decided to have a crack at the other half. I told myself, if I can get it working, I'll order replacement parts to fix its crippled sibling.
Sitting down to solder, I felt a wave of focus wash over me. I was ready. The solder flowed like a spring during torrential downpour. In astonishingly little time, I had finished! And this time the keys actually worked!
This triumph roused fresh motivation. I got to work, resoldering the first board with my newfound soldering mastery.
After 10 hours of work, and more reshoots than blockbuster starring a Me Too'd actor, I had finished soldering.
I fitted the final components, switches and keycaps. Finished. The culmination of my effort sat in front of me like the karate trophy I never received as a child.
Retro
You must be wondering, what's it like typing on this mega awesome DIY keyboard? What's his WPM (words per minute for those not in the know)? Did it finally unlock his 10x dev potential?
Well, you'll be disheartened to know, I'm typing this post with my Macbook's built-in keys. I never could get comfortable using my Lily. It was too foreign, too unorthodox. A keyboard only suitable for an outlaw. Not a regular old conformist like me.
Instead, I pursued a hand therapist. Her name was Debs, she's very nice and sorted me out for the modest price of £80. Enough for 1/4 of a DIY Lily58.
Would I say it was worth it? Did the journey matter more than the destination? Most likely yes. It was a lot of fun and inspired me to seek other hardware and electronics projects. Including gear, I spent approximately £300, roughly the same as the price of a pre-made ergonomic keyboard. However, that feeling of accomplishment was priceless, and this project reminded me, that if I want to, I can pull-off thorny projects and create something both material and functional.